Saturday, May 30, 2009

Removing the Rear Suspension

The procedure for removing the suspension outlined in the Haynes manual is pretty accurate. Except it might be important to note that removing the mounts from the body rather than from the suspension is a lot easier to do. This is a two person job, no matter how you look at it. There are way too many seized nuts to be fighting with on your own.


4 axle stands and 1 floor jack. The big 6 ton stands are under the jacking points with a piece of wood in between to fit onto the lifting pin. The blue 3-1/2 ton stands were moved around whenever we felt paranoid about something.


Safety strap, locking wire and nut came off the radius arm. Taking out the exhaust took most of the day. I had sprayed all the nuts with penetrating fluid the day before, but I ended up snapping off all the nuts that held the exhaust fittings.


Brake hose disconnected. And another hydraulic cable of sorts disconnected on the other end. And another unknown very thin steel line was just connected to the suspension using a rubber hose sleeve. It was cut to remove the line as the rust prevented us from sliding it off. The handbrake cable is fixed using a split pin.
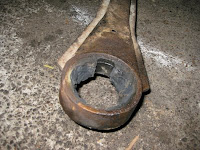


Taking off the radius arm was the most difficult job. We put the wheels back onto the hubs and rocked the entire assembly until they tore away. The left arm was really stubborn. We used a big wooden log and pivoted it out. Obviously you want to be a little more careful if your car has new bushing.


The job took 15 n00b man hours. The most important tool of the day was definitely the hammer.

Gallery - 82c Thermostat


CAD $13.34 from AutoPartsWAY.ca - beat that XKs Unlimited!


Interestingly enough my car has a sensor on both left (top) and right (bottom) thermostat housing. Apparently the EFI cars had a sensor on the left hand side thermostat housing. Why would someone swap in the thermostat housing from an EFI car onto my carby?

Thursday, May 28, 2009

Gallery - Brembo!!!

I got my brake discs today. I try and buy this sort of stuff from 1st level distributors. But at this level stock levels are very erratic, and so I ended up getting Brembo discs for the rear and Zimmerman (Porsche) discs in the front. All 4 discs costs about CAD$250 after shipping and taxes.

Gallery - Sound Mind in Disguise

Gallery - Rebuilt Induction


Gallery - Rebuilt Brake Pedal Box


Getting those white moulded plugs into the master cylinder (for the reservoir hoses) has now officially ranked itself as one of the most painful jobs I've done. I had to literally stand on the master cylinder to get them to go in. All the squeezing and squishing has made my fingers so sore that typing this is even hurting.

Saturday, May 23, 2009

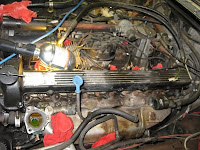
Engine Bay Overhaul

A friend and I started stripping down the jag for her first major restoration.In the process, we only lost 1 piece (one of those air rail feet) and snapped only 1 bolt (right exhaust shield rear bolt). The air rail foot will have to be found... it has to be somewhere in the garage.

We discovered disconnected sensors, missing thermostats and a lot of loose wiring.

Hopefully some of you will be able to help me identify a few pieces.


On the left, I've laid out a set of wires. It is one wire, that splits into two. Each fork has 1+2 wires. The only one which was connected was the shorter fork, single 1 wire to the throttle pedestal. Where do the other wires go?


On the driver's side (LHD) of the car there is a opening in the bulkhead which had a small rubber sock like thing. It was removed because it had a big crack in it. What is it meant for? What is it called? Where do I get a replacement?


Before:


After 1 hour of cleaning: