

4 axle stands and 1 floor jack. The big 6 ton stands are under the jacking points with a piece of wood in between to fit onto the lifting pin. The blue 3-1/2 ton stands were moved around whenever we felt paranoid about something.


Safety strap, locking wire and nut came off the radius arm. Taking out the exhaust took most of the day. I had sprayed all the nuts with penetrating fluid the day before, but I ended up snapping off all the nuts that held the exhaust fittings.


 Brake hose disconnected. And another hydraulic cable of sorts disconnected on the other end. And another unknown very thin steel line was just connected to the suspension using a rubber hose sleeve. It was cut to remove the line as the rust prevented us from sliding it off. The handbrake cable is fixed using a split pin.


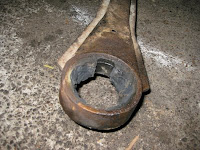
Taking off the radius arm was the most difficult job. We put the wheels back onto the hubs and rocked the entire assembly until they tore away. The left arm was really stubborn. We used a big wooden log and pivoted it out. Obviously you want to be a little more careful if your car has new bushing.


The job took 15 n00b man hours. The most important tool of the day was definitely the hammer.
No comments:
Post a Comment